
Today we present to you an option which allows to block the rotation of a part when we add a coaxial constraint to it. For example, it is common to have screws, washers or nuts to be constrained coincidentally on a flat surface and then coaxial with a hole or cylindrical surface. On the other hand, the part turns on itself and sometimes it is necessary to block this rotation. This can be done using the “lock rotation” option.
Lock rotation when creating the coaxial mate
When you use the “mate” function, and you select two cylindrical faces, SolidWorks defaults to the coaxial mate. It also adds below the contextual menu that appears the option “lock rotation”. The option is also available in the properties manager. By clicking on the option, the part will no longer be able to rotate on itself. Thus, you will not need to add a parallel constraint with a plane in order to block the rotation.
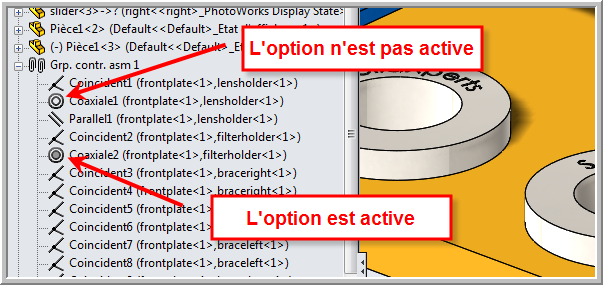
Also, note that the constraint in the design tree has a different symbol. The inner circle is shaded when the constraint contains the option. The “-” symbol will also no longer be present in front of the part in the design tree to indicate that the part is fully constrained.
Lock rotation after adding constraints
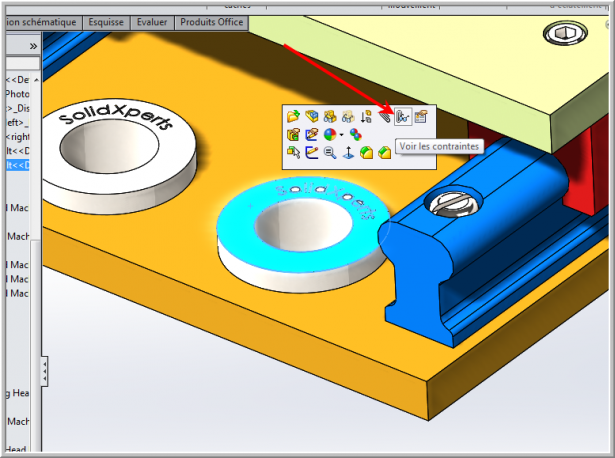
If you have already added the constraints and forgot to add the option, it is possible to add it later. All you have to do is select the part to block, select from the contextual menu that appears on the screen and choose “See constraints”. A window will open with the coaxial constraint to choose. All you have to do is right click on the constraint and choose “Lock rotation”.
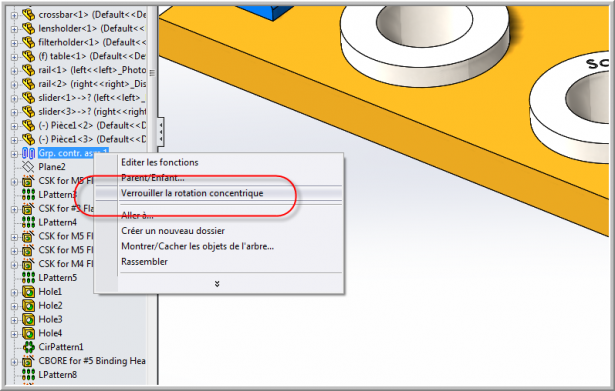
Lock rotation of all mates in the assembly
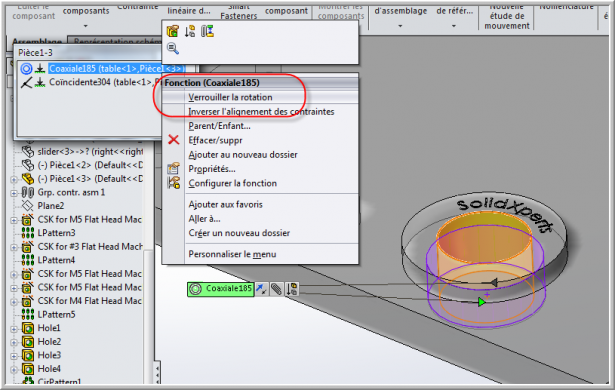
Finally, if you open an assembly from a colleague who does not know this option, you can apply the lock option to all mates. Just choose the constraint group and select “lock concentric rotation”. The option will be applied for all coaxial constraints in the assembly.
You can watch our Tech Brief on this topic or view several other SolidWorks Simulation tips and tricks by clicking here.
