Have you ever wanted to streamline the AutoCAD user interface (UI) to better suit the way you work or change the placement of the tools you use frequently? Maybe you only use certain tools when annotating a design or want to use toolbars to compliment the functionality on the ribbon.
Workspaces allow you to control the display and position of most UI elements within the AutoCAD application window. Once you have arranged the AutoCAD UI, you can save the current state as a named workspace which can later be restored. Creating task-based or industry specific workspaces can be a great way to ensure you have access to the tools you need when you need them.
The following is a list of UI elements that can be controlled with a workspace:
- Palettes
- Quick Access toolbar
- Ribbon tabs and panels
- Legacy pull-down menus and toolbars
Here are some of the basic techniques that can be used to change the AutoCAD UI to better suit the way you might work:
- Add and remove tools from the Quick Access toolbar (QAT)
- Hide and show ribbon tabs and panels
- Reorder ribbon tabs and panels
- Float a ribbon panel
- Hide and show palettes
Contents
Save and Set a Workspace Current
A workspace is used to store the current state of the AutoCAD UI.
In this exercise, you’ll save a workspace named “HYT Workspace” and set a saved workspace current.
- In AutoCAD, on the ribbon, click . Find
The Tool Palettes window should now be displayed in the AutoCAD UI.
- Reposition the Tool Palettes window on-screen based on your preference of location.
- In AutoCAD, on the status bar, click Workspace Switching. Find
- On the menu, choose Save Current As.
- In the Save Workspace dialog box, type HYT Workspace and click Save.

The new workspace is created and set current.
- On the status bar, click .
The Drafting & Annotation workspace is set current; the Tool Palettes window should no longer be displayed.
- On the status bar, click .
The HYT Workspace workspace is set current; the Tool Palettes window is displayed once again.


Add and Remove Commands from the Quick Access Toolbar (QAT)
The QAT contains several file management tools, by default. However, there are several other tools that can be displayed on the QAT. The Customize button provides access to additional tools that can be added to or removed from the QAT along with some additional options.

In this exercise, you’ll add the Batch Plot tool and Layers drop-down list to the QAT while removing the Plot tool.
- On the status bar, click to make sure it’s the current workspace.
- On the QAT, click Customize.
- From the menu, choose Batch Plot and Layer.
Both items should now be displayed on the QAT.
- From the menu again, choose Plot.
The checkmark should now be cleared from the item and the tool should be removed from the QAT.
- On the status bar, click .
- In the Save Workspace dialog box, click the drop-down list and select HYT Workspace. Click Save.
The changes to the QAT are saved to the workspace.


Control the Display and Placement of Ribbon Tabs and Panels
The ribbon is the main area of the AutoCAD application window that provides access to the tools used to create and modify the objects within your drawing. Each ribbon tab can be thought of as a logical grouping of related tools. The panels on a ribbon tab help to further refine each logical grouping.

Show and Hide Ribbon Tabs and Panels
The display state of a ribbon tab or panel can be changed based on whether you use the tools that are part of that logical grouping. If you right click over any tab, you can see which tabs are currently displayed (checkmark in front of the name) and those that are currently hidden. You can also right-click over the current tab to see which panels are currently displayed or hidden for that tab.
In this exercise, you’ll hide the Parametric ribbon tab and show the Coordinates panel on the View tab.
- Make sure the HYT Workspace is the current workspace.
- On the ribbon, right-click over any tab on the ribbon and choose .
The checkmark in front of the Parametric tab should now be removed and the tab should be hidden in the interface.
- On the ribbon, click the View tab.
- Right-click over the View tab and choose .
A checkmark should now be placed in front of the Coordinates tab on the menu and the Coordinates panel should now be displayed on the View tab.
- Save the changes to the HYT Workspace.


Reorder Ribbon Tabs and Panels
Sometimes you might not want to hide a panel or tab but move it on the ribbon to a different place. You can visually reorder ribbon tabs and panels by doing one of the following:
- Drag a ribbon tab horizontally along the top of the ribbon to reposition the tab.
- Drag a ribbon panel’s title bar horizontally along the ribbon to reposition the panel.
In this exercise, you’ll reposition the Annotate tab and Dimensions panel.
- Make sure the HYT Workspace is the current workspace.
- On the ribbon, click and hold the mouse pointer button over the Annotate tab.
- Drag to the left of the Insert tab and release the mouse button.
- On the Annotate tab, click and hold the mouse pointer button over the Dimension panel’s title bar
- Drag to the left of the Text panel and release the mouse button.
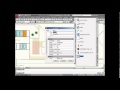
The ribbon should now look like the following image.


Float a Ribbon Panel
Panels on a ribbon tab can be made to float in the application window. When a ribbon panel is floating, it is visible no matter which ribbon tab is active. This can be very beneficial when you might be switching between several different types of tools frequently. For example, you might want to float the Layers or Properties panels, so they are visible even when the Insert or Annotate tabs are current.
In this exercise, you’ll float the Layers panel from the Home tab.
- Make sure the HYT Workspace is the current workspace.
- On the ribbon, click the Home tab.
- Hold the pointer button over the Layer panels title and drag over the drawing window.
- Once over the drawing window, release the pointer button to float the Layers panel.
Move the pointer cursor over the Layers panel to reposition it using the grip bar or click Return to Panel to return the panel to the ribbon tab which it came from.
- Save the changes to the HYT Workspace.


Display and Reposition Palettes
AutoCAD utilizes several modeless palettes to manage layers, external references, sheet sets, and much more. As part of a workspace, you can save the current display state and positions of the palettes you use most frequently. Use the commands located on the Palettes panel of the View tab to toggle the display state of the available palettes and then drag the palette by its title bar to change its position. After setting up the palettes where you want them, save your workspace and upon restoring the workspace all palettes will be displayed based on their saved state.

In this exercise, you’ll display the Properties palettes.
- Make sure the HYT Workspace is the current workspace.
- On the ribbon, click the View tab.
- On the Palettes panel, click Properties.
The Properties palette and Tool Palettes buttons on the ribbon should now be highlighted on the View tab.
- Reposition the two palettes by dragging them using their title bars.
- Click Auto-hide on one of the palettes to collapse its display state.
Moving the cursor over the collapsed palette expands it temporarily.
- Save the changes to the HYT Workspace.

Modify a Workspace with the Customize User Interface (CUI) Editor
The Customize User Interface (CUI) editor provides much greater control over the UI elements that make up a workspace. You can display the CUI editor by doing one of the following:
- On the ribbon, click .
- At the Command prompt, enter cui.
In the CUI Editor, under the Workspaces node, select the workspace you want to modify. Then edit the settings under the Workspace Contents and Properties pane.

For more information on how to customize a workspace with the CUI editor, see About Workspace Customization.
Restore the AutoCAD “Classic” Workspace
Before the modern AutoCAD UI with the ribbon and Quick Access toolbar, pull-down menus and toolbars were used to access frequently used commands and tools. While the “Classic” workspace no longer is part of the AutoCAD installation, you can still use many of these legacy features as part of your workflow. You can find information on how to setup the “Classic” workspace in AutoCAD by following the steps in the FAQ: Where is the AutoCAD Classic workspace? topic.
Summary
Workspaces make it easier to reduce the number of tools displayed in the AutoCAD UI and reduce the number of clicks needed to access frequently used tools. The next time you start AutoCAD, look at the tools you frequently use and see if you can modify the workspace to simplify the AutoCAD UI based on the way you work.
Workspace Commands and System Variables
| Command Name | Description |
| CUI | Manages the customized user interface elements in the product. |
| WORKSPACE | Creates, modifies, and saves workspaces and makes a workspace current. |
| WSSAVE -WSSAVE | Saves a workspace. |
| WSSETTINGS | Sets options for workspaces. |
| System Variable Name | Description | Default Value | Saved In |
| LAYOUTTAB | Toggles the visibility of the Model and Layout tabs. | 1 | Registry |
| STATUSBAR | Controls the display of the status bar. | 1 | Registry |
| WSAUTOSAVE | Saves changes you made to a workspace when you switch to another workspace. | 0 | Registry |
| WSCURRENT | Displays the current workspace name at the Command prompt and sets a specified workspace to be the current one. | Varies | Registry |
| WORKSPACELABEL | Controls whether to display the name of the current workspace in the status bar. | 0 | Registry |
Source: Autodesk