Hatching is section-lining, usually shown in section views, on all portions of components that contact or cross the section line. Hatch patterns can be modified in breakout views, just as in section views. Unique hatch patterns can be assigned to materials defined in the Style Library.
You will first create a ‘From Point’ breakout view in the top view. Select the top view, and then press S to create a sketch attached to the view. Create a closed loop Spline, approximately cutting the top view in half and looping around the top, and then finish the sketch.
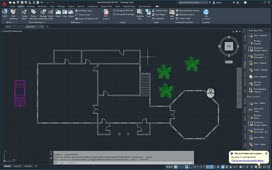
Select Break Out from the Modify panel and then select the Top view. The Break Out dialog box opens. The sketch is automatically selected as the Profile. The From Point selection button is active, so select the mid-point where the Cylinder and Cylinder Head join in the Front view. Select the Section All Parts option and click OK. The Break Out view is displayed. The components that are ‘broken’ are now hatched.
To edit the Cylinder’s hatch pattern, double-click the hatch pattern and the Edit Hatch Pattern dialog box opens. The By Material option is not available because a hatch pattern has not been assigned to the Cylinder’s material. You will assign a hatch pattern to reflect the component’s material.
Cancel the dialog. Now, right-click a hatch pattern in the drawing view, then select Edit Hatch Style. The Hatch (ANSI) settings should be displayed in the editor. Select the plus sign ( + ) next to Standard in the browser and select Default Standard (ANSI-mm). The Default Standard (ANSI-mm) settings are displayed. Select the Material Hatch Pattern Defaults tab and verify that Filter Styles is set to Local Styles.
Under Import Materials, select From Style Library. All of the materials in the Style Library are displayed with their assigned hatch pattern. You can see that ANSI 31 is the ANSI hatch pattern assigned to Cast Iron. Change the hatch pattern for Steel, Mild to ANSI 32 from the Hatch Pattern drop-down next to the material.
To change the hatch pattern for Stainless Steel to CUST01, select the Hatch Pattern drop-down and select Other. In the Select Hatch Pattern dialog box, scroll down the list to CUST01 and check the Offered box next to it. Select CUST01 and then click OK. You can see that CUST01 now displays next to Stainless Steel. Click Save.
If you have write access to the Style Library, you could right-click Default Standard (ANSI-mm) and select Save to Style Library to make the change globally. But for now, select Done.
Now change a hatch pattern to display by material type. Select a hatch pattern. Right-click and select By Material from the Pattern flyout menu. Now you can see the hatch pattern update to display by its material type assigned in the Style Library.
Source: Autodesk