Creating Orthographic Views with Solid View
After you create a three-dimensional part, you may need to create two-dimensional orthographic views of the 3D model in order to produce working drawings. There are a number of ways to do this in AutoCAD.
One of the methods uses three related tools: Solid View, Solid Drawing, and Solid Profile. To find these tools, on the Home ribbon, expand the Modeling panel. These tools help you do the work necessary to draw 2D representations of solids that mimic conventional 2D drafting. And these three tools are meant to be used in the order in which they appear in the Modeling panel. Since you will need to use all three tools, pin the Modeling panel so that it does not collapse.
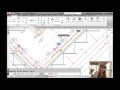
The Solid View tool creates orthographic views, layers, and layout viewports automatically for 3D solids. Click the Solid View tool. The program switches to a paper space layout and prompts you to enter an option. There are four options: UCS, Ortho, Auxiliary, and Section. Since this is the first view, you should make sure that it is created relative to the World Coordinate System, so choose the UCS option. The program prompts you to select an option. Choose World. Next, the program prompts you to enter the view scale. Since you cannot fit all of the views onto the paper space layout at full-scale, but they will probably fit at half-scale, type “0.5” and press ENTER.
Next, the program prompts you to specify the view center. Click to pick a point near the upper-left corner of the sheet. As soon as you do, the program generates a top view based on the World Coordinate System. If you do not like where the view is placed, you can click again to specify a new center. Once you are satisfied with the placement, press ENTER.
Next, the program prompts you to specify the first corner of a viewport. Click to the upper-left of the view to specify that corner. Then, the program prompts you to specify the opposite corner. Click to the lower-right of the view to specify that corner. As soon as you do, the program prompts you to enter the view name. Type “TOP” and press ENTER.
The command remains active so that you can create another view. To create another orthographic view, choose Ortho. The program prompts you to specify the side of the viewport to project. Click the bottom edge of the viewport. Then, the program prompts you to specify the view center. Move the cursor down and then click. The program immediately generates a front view. Again, if you do not like the placement, you can click to select a different point. Once you are satisfied with the placement, press ENTER.
Again, the program prompts you to specify the first corner of a viewport. Click to specify the opposite corners of the new viewport. As soon as you do, the program prompts you to enter the view name. Type “FRONT” and press ENTER.
Again, the command remains active. Choose Ortho. Again, you are prompted to specify the side of the viewport you want to project. This time, click the right edge of the Front viewport. The program prompts you to specify the view center. Click to the right of the Front view to position the view. Once you are satisfied with the placement, press ENTER. Then, specify the opposite corners of the viewport surrounding the view. When the program prompts you to enter the view name, type “SIDE” and press ENTER.
The command is still active. Next, you will create a section view. Choose the Section option. The program prompts you to specify the first point of a cutting plane. The Top viewport is now the active viewport. If it is not the active viewport, you can click in that viewport to activate it. Use Midpoint object snap to select the midpoint of the left side of the object. The program then prompts you to specify the second point of the cutting plane. Click to select the midpoint of the right side of the object. The program then prompts you to specify the side to view from. Click below the cutting plane you just created.
The program then prompts you to enter the view scale. Press ENTER to accept the default of 0.5, so that the section will be the same scale as the other views. Now the program prompts you to specify the view center. Click to position the new view below the Front view. Again, once you are satisfied with the placement, press ENTER, and then specify the opposite corners of the viewport surrounding the new view. When prompted, name the view “SECTION” and press ENTER.
You can continue to create additional views. Once you are done, press ENTER one more time to end the command.
You have used the Solid View tool to create several related viewports. The views are all properly arranged, but they still display the actual 3D model using the current visual style. While you could stop here if you wish, to create two-dimensional versions of these views, you need to use the Solid Drawing tool to continue to adjust these views.
Source: Autodesk