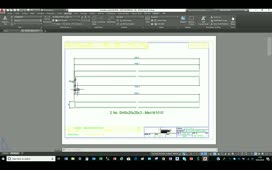
In order to translate your design from the virtual world to the real world, you need to document it so that manufacturing has the proper information to build your digital prototypes. A Break Out view removes a defined area of material to expose obscured parts or features in an existing drawing view.
Before a Break Out view can be created, you need a closed sketch that is associated with the view that is to be broken out. Select the Top view, and then on the ribbon, Place Views tab, Sketch panel, click Start Sketch. It is important that you select the view first, and then create the sketch; otherwise the sketch will not be attached to the view.
On the ribbon, Sketch tab, Create panel, click Spline. Create a closed Spline, approximately cutting the top view in half. Right-click in the graphics window, and select Finish Sketch from the Marking menu.
On the ribbon, Place Views tab, Modify panel, click Break Out and select the Top View. The Break Out dialog box opens. The sketch is automatically selected as the profile. The first Depth choice is From Point. Notice that the selection arrow is red, indicating that a selection needs to be made. In the front view, click the point on the right edge where the cylinder meets the cylinder head.
Realize that Hidden Lines can be turned on or off in the Break Out view. Select the Section All Parts option and then click OK. The Break Out view is displayed.
You can now create an Isometric view from the Break Out view. Edit the Isometric view and the Drawing View dialog box opens. In the Style group, deselect the Style from Base option, and then change the Style to Shaded. Notice that the Break Out depth is to the bottom of the cylinder head, and that all internal parts are sectioned. Use the Rotate tool to modify the isometric view into an upright orientation.
Next, you will modify the Break Out view to use a sketch for the break depth. Select the front view and click Create Sketch from the Sketch panel on the ribbon. This time, create an open spline in the base view. Click OK in the mini-toolbar to create the spline, and then finish the sketch.
To edit the Break Out view, right-click the Break Out view in the browser and select Edit Break Out from the context menu. Change the Depth option to To Sketch, select the sketch in the front view, and then click OK. Now, the isometric view follows the spline curve. Also, notice that the sketch in the front view was consumed and its visibility has been toggled to invisible.
In the browser, double-click the Break Out view to edit it once again. This time, change the Depth to To Hole. In the front view, select the hole in the cylinder and click OK. Now the hole center determines the depth. Notice that the sketch in the front view has become unconsumed and therefore, its visibility has been restored. Delete that sketch.
Edit the Break Out view and deselect Section All Parts. However, nothing changes in the isometric view. This is because the section participation must be changed in the browser. Expand VIEW2 if it is not already, and then expand the Valve assembly below VIEW7. Right-click the Spring part. Hover the cursor over Section Participation and select None from the flyout menu.
Now the spring is not sectioned. Any of the model’s components can be individually manipulated for section participation.
Edit the Break Out view and select Depth Through Part. Select the lower cylinder in the Break Out view, and then click OK. Now you can see that the cylinder is sectioned, but the cylinder head is not.
Once more, edit the Break Out view and click the Selector button. Another method for selecting the components for Through Part Break Out is to select them in the browser. Select the Depth selection button, and then in the Valve assembly below VIEW2, select the CylHead part file. Click OK. Now, all exterior components are sectioned, leaving the internal components complete.
The Break Out sketch can be edited either by right-clicking the sketch in the browser and selecting Edit, or by double-clicking the Sketch. You can use the CTRL key to deselect multiple objects that you do not need. Also, any closed loop sketch that is attached to a view can be used to create a Break Out view by right-clicking the Sketch and selecting Add Break Out from the context menu.
Source: Autodesk