Creating and Editing Complex Action Macros
With some practice, you can create complex action macros that eliminate a number of repetitive steps. This can be very powerful. Once the macro has been created, it can save you a great deal of time and greatly simplify repetitive tasks.
Remember that when you first record an action macro, it records the exact steps you perform and will simply repeat those exact steps. But after you have recorded the macro, you can edit those steps to make the macro much more versatile.
For example, suppose someone has already recorded an action macro and assigned it the name ROOMLABEL. The macro places text in a specific room and the text always says “MY OFFICE “. Delete this text and you will learn how it works.
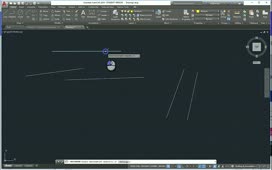
On the Manage ribbon, in the Action Recorder panel, select the ROOMLABEL macro and click Play. The program opens the Object Snap tab of the Drafting Settings dialog. Regardless of any changes you make to the object snap settings, the macro does not do anything with those settings. Remember that the Action Recorder will not record anything that happens in a dialog box. Simply click OK to close the dialog. The macro places a label in the room on the left and adds the words “MY OFFICE.”
The macro always places text in this specific room and the text always says “MY OFFICE.” At this point, the macro is not very useful, and having the Drafting Settings dialog box appear is simply confusing. The dialog box appears because when the macro was initially created, the person recording the macro opened that dialog box to adjust some of the object snap settings. But remember, any input made using dialog boxes is not recorded as part of the action macro.
But once a macro has been recorded, it can be modified to make it more useful. For example, you could change it so that it can place text in different rooms and allow you to specify different room names.
To edit the macro, select it in the Available Action Macro drop-down. Then, expand the Action Recorder panel and pin it open. It is helpful to also drag the bottom of the panel to make it bigger so you can see more of the macro without having to do as much scrolling.
The macro starts off by creating a new layer called LABEL, making that the current layer, and setting its color to red. It then starts the TEXT command. Then, it opens the Object Snap dialog and makes a change on the Drafting Settings tab. But again, anything that happens in a dialog box will not recur when you play the macro.
The TEXT command then continues, with the justification set to middle, the insertion point specified, the text height set to 8 units, and the text rotation angle set to 0-degrees. Then, the actual text is entered. Finally, the macro changes the current layer back to 0 and then ends.
You can edit any of these items to make the macro more useful. Before you do, however, remember that it is always a good idea to first save a copy of the macro and then modify the copy. To do this, scroll back to the top of the Action Tree, right-click the name of the macro, and choose Copy… from the shortcut menu. In the Action Macro dialog, in the Action Macro Command Name field, name the copy “ROOMLABEL-01,” and then click OK. Now you are ready to start editing the macro.
In the Action Tree, right-click OSNAP and choose Delete so that the macro no longer displays the Drafting Settings dialog. When the program asks if you are sure you want to delete the action node, click Delete. Now you are ready to test that change. First, delete the existing room label. Then, click Play. The macro no longer displays the Drafting Settings dialog. Click Close.
Expand the Action Tree and pin it open again.
To have the text read as something other than “MY OFFICE,” in the Action Tree, right-click Text Formatting and choose Pause for User Input. Then, delete the label and click Play to test the macro again. Notice that this time, the program stops and waits for you to enter the text, but it is not very obvious what is happening. You can improve on that by adding a user message. Enter some text, press ENTER, and then click Close to close the dialog.
Expand and pin the Action Tree again. Then, right-click the line above Text Formatting (the 0-degree text rotation angle) and choose Insert User Message…. AutoCAD displays the Insert User Message dialog. Type “Enter the room name” and then click OK.
Delete the label and then play the action macro again. Now you see the user message, making it much clearer that you are expected to type the room name. Click Close. Then, enter the room name, press ENTER, and then click Close to close the dialog.
The macro would be even more useful if you could place the label in any room, rather than always placing it in the same room. Expand and pin the Action Tree again. Then, right-click the absolute coordinate and choose Pause for User Input. Then, play the action macro again.
This time, the program prompts you to specify the middle point of the text. Once you do that, you see the message telling you to enter the room name. Click Close. Then type “OFFICE,” press ENTER, and then click Close.
Now, not only did the macro place the room label where you specified, it automatically set the proper text height and text rotation angle, used the middle text justification, and placed the label on the proper layer and with the proper color. It will do this even if you are working in a different drawing.
On the Quick Access Toolbar, click New to create a new drawing based on the default template. On the Home ribbon, in the Layers panel, when you expand the Layer drop-down, you can see that the only layer that exists in this drawing is layer 0.
On the Manage ribbon, in the Action Recorder panel, select the ROOMLABEL-01 macro and click Play. The program prompts you to specify the middle point of the text. Once you specify that point, you see the user message box. Click Close. Then type “MY OFFICE,” press ENTER, and then click Close.
The text you just created is red. On the Home ribbon, in the Layers panel, expand the Layer drop-down. You can see that the macro automatically created the LABEL layer, gave it the proper color, placed the text on that layer, and then switched back to Layer 0.
Source: Autodesk