Have you ever wondered what kind of AutoCAD skills you really need to know to succeed as a designer? You may be already familiar with Cathleen Jones from her customization tips and rules for success on our blog, and now, she’s back doing another interview with us on the most important functions she learned in her 35-year career as a CAD designer. In the first of this two-part series, Cathleen shares her top AutoCAD skills you need to master to succeed.
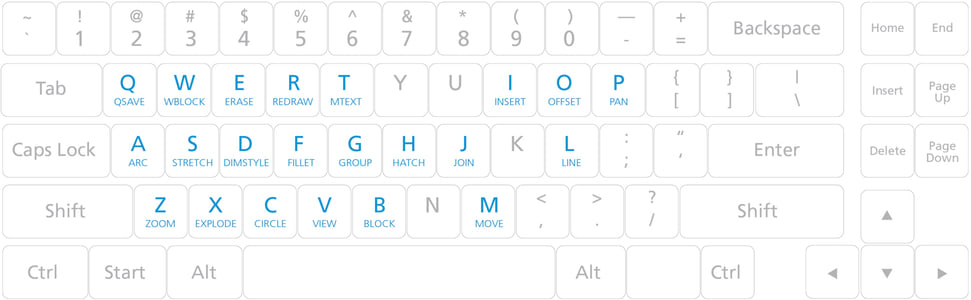
1.You have two hands, use them! Using shortcut keys while “mousing”
“One of the biggest things I noticed from new users is that they are mousers only. That’s a big mistake. You have two hands and the fastest way to do anything is by using commands wherever your hands are positioned. If you just did point input, and you have your next command on a right-click, then right click it. If you just did some text, and your hands are on the keyboard, your next command should be a keystroke. This is what is going to save time in the long run, make you as efficient as possible, and help you shine at your job.”
Check out the AutoCAD shortcut guide to begin mastering keyboard shortcuts.
2. Editing a drawing file to match the original user – It’s more than just (MA) MATCHPROP
“When a student first enters the field, their only drafting experience has been starting drawings from scratch. However, when they come into a new job as an entry level drafter or designer, they are going to be given old drawings with markups—drawings that someone else has done. This makes it important to know how to match the standards that were already created, which ultimately affects the output that goes to the client. There are three key things to know to match standards: importing layers, inserting blocks, importing PAGESETUP. “
- Importing layers from another drawing
“This is actually something that I learned from Lynn Allen. You can reference other drawings, other template files and you can even import text styles and dimension styles. So it’s really key knowing where to go for your resources to make a drawing look like a previous drawing.”
Learn about importing layers here.
- Inserting blocks already used on the drawing
“When it comes to inserting blocks that are already used on a drawing, if you query on the name and then insert it using the “insert” command, you don’t know if you’re putting it on the same layer at the same scale that was used previously. So, it’s important to know that you can just copy it across, or that you can use the “Add Selected” option, which is on the right-click menu. The beauty of this command is that you can pick several items (blocks, text) together and they will keep their respective layer locations.”
Learn more about blocks here.
- Importing a PAGESETUP from another drawing
“PAGESETUP is a great tool. It allows you to pre-set the plot options, preview your plot, and save your settings. If you have several paperspace layouts in your drawing, you can copy your PAGESETUP from one to another or even import them from another drawing or template.
“Once you have done PAGESETUP for your layout, this gives you the option to use the Batch Plot command. You can select all of the drawings in your project, or just a few, and not worry about plot settings because Batch Plot will read the pre-set features for each layout. This allows you to plot drawings with totally different settings at the same time and to plot them in the background while you go on to do other things.”
Get the details here.
3. Creating blocks and custom palettes
“A lot of times, I would come into a small company, and they would have some blocks created and a small library formed. However, block creation is more than just selecting a few objects out of your drawing, using the WBLOCK command, and saving it to a directory. It’s knowing what layer those objects are on and where the insertion point is located.
Two main decisions are based on how you will use that block. Will this block be inserted on different layers with different linetypes? Then you need to draw your block objects on Layer 0. That way, when you insert it into a drawing, the features of the block will inherit the layer settings. If you create your objects and text on a specific layer, then they are always going to be on those original layers, with that color and linetype. The block will bring in the layer features with it.
The second decision is related to how that block will inserted into a drawing. Is it a block that is always in the same place, such as title blocks, logos, or notes? Then I suggest you set the block insertion point to the lower left corner relative to 0,0,0. If it is a smaller block that is inserted at various locations around a drawing, the insertion point needs to be designed to best utilize placement. If it’s relative to another object, place the point where the other object touches. Items placed along walls will have their points set where they touch the wall. If the block will be more free-floating, such as a bubble callout or text string, choose the place that allows accurate placement. This may be in the center or at an edge. By putting a little bit of forethought into your block creation, you can design blocks that will be useful for a long time.
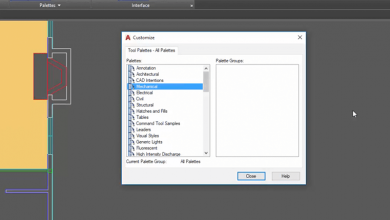
Once you have your blocks created, you may want to group them by usage or type and store them on a custom palette that can sit on the edge of your screen for easy access during drawing creation. For example, when I was working in a multi-discipline position, I’d group my electrical blocks, fire alarm blocks, and lighting blocks together. Your customized palette can be arranged so that each group could have their own tab as well as each tab using dividers to further sort the blocks.”
To get started, check out AutoCAD Tip — Customize Your Tool Palette, by Lynn Allen/Cadalyst Magazine:
To learn more, check out Beyond the Basics: Working with Tool Palettes in AutoCAD 2016, presented by Volker Cocco and moderated by Sarah Emmsley & Ashley Droste:
Stay tuned for part 2, in which Cathleen shares more of her indispensable tips for finding success!
Source: Autodesk