Welcome to the second in a series of posts to lead you through the powerful Sheet Set functionality available in AutoCAD. In the first post, R.K. McSwain introduced you to the Sheet Set manager (SSM) and offered an overview of some of the advantages to using sheet sets. In this post, I provide an overview of the general process from getting started with the most basic steps to implementing sheet sets for maximum efficiency.
Contents
How Sheet Sets Compare to a Traditional Workflow
The drawing file created by the SSM is just like any drawing you create using traditional methods. You can draw geometry in model space, create additional layout tabs, etc. The only technical limitation is that each sheet in the SSM sheet list can only point to one layout in a drawing file. If you have more than one layout in your drawing, you can import those additional layouts into your sheet list.
There is no technical reason why you shouldn’t have multiple layouts in your drawing. However, the new sheet set paradigm or “best practice” is to have one sheet drawing (DWG file) for each sheet in your set. The main benefit for this is to enable multiple users to work on different sheets at the same time. If you have two sheets that point to different layouts within the same drawing, the drawing file will be locked as soon as one person opens one of those sheets, which is how AutoCAD has always worked.
Even if the intended process for implementing sheet sets deviates from your current workflow, don’t be deterred from using them. You can accomplish more than half the process without changing your current workflow while enjoying significant productivity gains all along the way.

How Sheet Sets Are Intended to Work
The intended process for using sheet sets isn’t strictly enforced. However, you should consider how you can transition to this process so that you can take full advantage of Sheet Set functionality.
- Create your model geometry in its own drawing file (DWG). Continue to create model geometry in modelspace including xrefs, nested xrefs, etc. In that particular DWG file, focus on nothing but the model… try to forget that the layout tab even exists, this is your “model file.” From now on, let the “sheet file” deal with the layout.
- Create a new sheet in the SSM. This will create a new drawing file (DWG) with an active layout tab. The sheet name in the sheet list is simply a shortcut to that layout in the DWG file.
- Open the sheet, which is really opening the drawing file with that sheet layout active.
- Add resource drawing views to the sheet layout. This is where you create layout viewports and attach the model drawings as xrefs. Using the sheet set paradigm as it was intended, you collect design information from other sources (external references attached in model space) and assemble them into a sheet layout (titleblock, viewports, notes, etc. in paper space). The only objects that should exist in model space are the attachments to external files.
- Add sheet information to the sheet layout. You might add sheet notes or other sheet (paper space) information that is specific to the sheet. Although you can (technically) draw in model space, create more layouts, etc., the intention is for this particular DWG file to be a single sheet with external references to model drawings.
Making the Transition
Aside from separating your Model and Layout into two different drawings, the general concepts (xrefs, model space, viewports, layouts) should be familiar to you. In the upcoming blog posts we’ll take you through the process one step at a time. The good news is you can get started with sheet sets (Steps 1-8) and transition to a sheet set master (Steps 9-13) without significantly changing your current process. You’ll likely see the most significant changes to your current workflow when you implement sheet sets for maximum efficiency (Steps 14-17).
Getting Started with Sheet Sets
Step 1: Creating a new sheet set
Step 2: Organizing your sheets
Step 3: Accessing your sheets
Step 4: Importing existing layouts
Step 5: Plotting using default page setups
Step 6: Publishing Sheets
Step 7: Creating Archive/Transmittal Sets
Step 8: Using named sheet selections
Transitioning to a Sheet Set Master
Step 9: Assigning sheet set properties
Step 10: Creating custom properties
Step 11: Creating new sheets
Step 12: Automating title block data
Step 13: Plotting using any page setup
Implementing Sheet Sets for Maximum Efficiency
Step 14: Creating sheet views
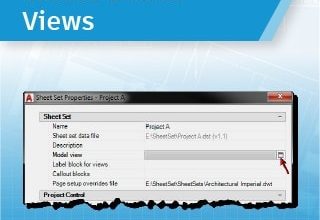
Step 15: Adding view labels
Step 16: Automating view label data
Step 17: Automating callout data
It’s important to remember, however, that regardless of how many steps you implement, sheet sets enable you to save time and work more efficiently! So, what are you waiting for?
You don’t want to wait? You don’t have to! Remember, you can always catch up on the entire Mastering AutoCAD Sheet Sets series!
Source: Autodesk